Introduction to Artisan Bread Recipe
There’s something incredibly satisfying about making your own bread. When it comes to an artisan bread recipe, the rewards far exceed the effort. Imagine this: the warm aroma filling your kitchen, that golden crust crackling as you cut into it, and a soft, pillowy interior waiting to be slathered with butter or packed with your favorite toppings. If you haven’t tried baking your own bread yet, you’re in for a delightful experience!
Why Make Artisan Bread at Home?
You might ask yourself, “Why should I take the time to make artisan bread when I can just buy it at the store?” Here’s the scoop:
-
Quality Ingredients: By baking your own bread, you have complete control over the ingredients. You can opt for organic flour, natural yeast, and avoid preservatives often found in store-bought options. Check out this resource for high-quality baking supplies!
-
Customization: An artisan bread recipe allows you to get creative! Want to add herbs, olives, or cheese? Go for it! You’re the chef here, and each loaf can be an expression of your tastes and preferences.
-
Therapeutic Process: Kneading dough is surprisingly therapeutic. It’s a great way to unwind after a stressful day. Plus, the tactile nature of bread-making can be very fulfilling.
-
Impress Family and Friends: There’s nothing like serving a fresh, homemade loaf to your guests. It elevates your hosting game and adds a personal touch to any gathering. Just imagine the compliments when they taste your creations!
-
Save Money: While artisanal bread may seem pricier, making it at home can actually save you money in the long run. Flour and yeast are relatively inexpensive, and you’ll be able to create several loaves instead of just one.
As a bonus, artisan bread-making is a fantastic conversation starter. Share techniques, flavors, and even invite friends for a baking night. If you’re unsure where to start, check out some essential tips and resources online at America’s Test Kitchen for inspiration.
By embracing the art of baking, you’re not just creating bread; you’re crafting a delightful experience in your own home. So let’s dive into this artisan bread recipe and get those hands doughy!
Ingredients for Artisan Bread Recipe
Crafting a delicious loaf of artisan bread at home is not just rewarding; it’s an experience every food lover should embark on! Let’s explore the essential ingredients and some exciting optional add-ins to elevate your bread-making game.
Essential Ingredients for Artisan Bread
To kickstart your artisan bread journey, you’ll need a few fundamental ingredients:
- Bread Flour: High in protein, this is vital for that desirable chewy texture.
- Water: Use warm water (around 110°F) to activate the yeast, making sure it’s not too hot!
- Yeast: Instant yeast is perfect for ease of use, helping the dough rise beautifully.
- Salt: A crucial flavor enhancer that also strengthens the dough’s structure.
Looking to dive deeper into flour types? Check out King Arthur Baking’s flour guide for a clearer perspective.
Optional Add-Ins for Extra Flavor
Feeling adventurous? Why not experiment with some optional ingredients to add character to your artisan bread recipe? Consider:
- Herbs: Fresh or dried, such as rosemary or thyme, can infuse your bread with delightful aromas.
- Seeds: Sesame, poppy, or sunflower seeds add texture and crunch.
- Cheese: Aged cheddar or feta can provide a savory punch to your loaf.
These simple additions can transform a standard loaf into a crowd-pleaser at any gathering! The beauty of artisan bread is in its versatility; so let your creativity shine. Happy baking!
Preparing Artisan Bread: Step-by-Step Guide
Making artisan bread at home may seem daunting, but following a straightforward process can lead to a warm, crusty loaf fresh from your oven. Here’s a step-by-step guide to help you through this rewarding baking adventure.
Mix the Dry Ingredients
Start by gathering your ingredients:
- 4 cups of all-purpose flour
- 2 teaspoons salt
- 1 teaspoon yeast
In a large mixing bowl, combine the flour, salt, and yeast. Mix with a whisk until evenly distributed. Using a whisk helps aerate the flour, ensuring your bread rises properly. Note that the quality of your ingredients plays a significant role in the final outcome. For more information on selecting quality flour, check out resources from King Arthur Baking.
Combine with Warm Water
Next, it’s time for the water! You’ll need about 1 and ½ cups of warm water (around 100°F). Gradually pour the water into the bowl with your dry ingredients. Use a sturdy wooden spoon to mix until it forms a shaggy dough. Don’t worry about kneading just yet; all we’re doing is creating a cohesive mixture that will develop flavor as it rises.
Let the Dough Rise
Cover the bowl with a clean kitchen towel or plastic wrap. Set it aside in a warm place for about 12 to 18 hours. This slow rise is crucial as it develops rich flavors and the characteristic texture of artisan bread. You can use this time to prepare your favorite toppings or side dishes to enjoy with your warm bread!
Forming the Dough
After your dough has risen and doubled in size, it’s time to shape it. Lightly flour your work surface and gently scrape the dough out of the bowl. Avoid punching down the dough; instead, handle it softly to maintain all those beautiful air bubbles. Shape the dough into a round ball by tucking the edges into the center.
Stretch and Fold Technique
Here’s where the magic happens. Using the stretch and fold technique, you will develop the dough’s structure without extensive kneading.
- Grab one edge of the dough and stretch it upward.
- Fold it over the center.
- Rotate the dough a quarter turn and repeat until you’ve gone around the entire sphere about four times.
This technique strengthens the gluten and improves the overall texture.
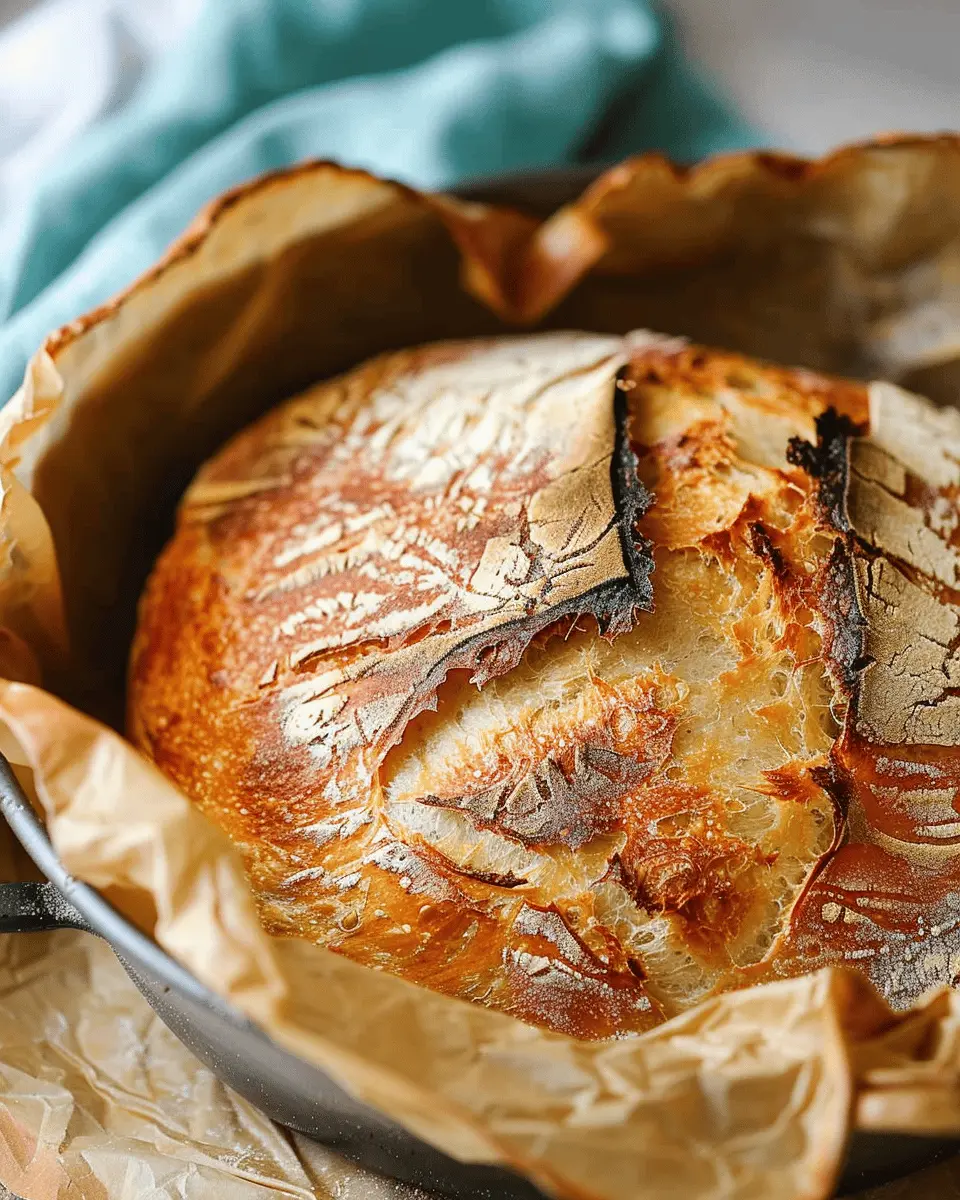
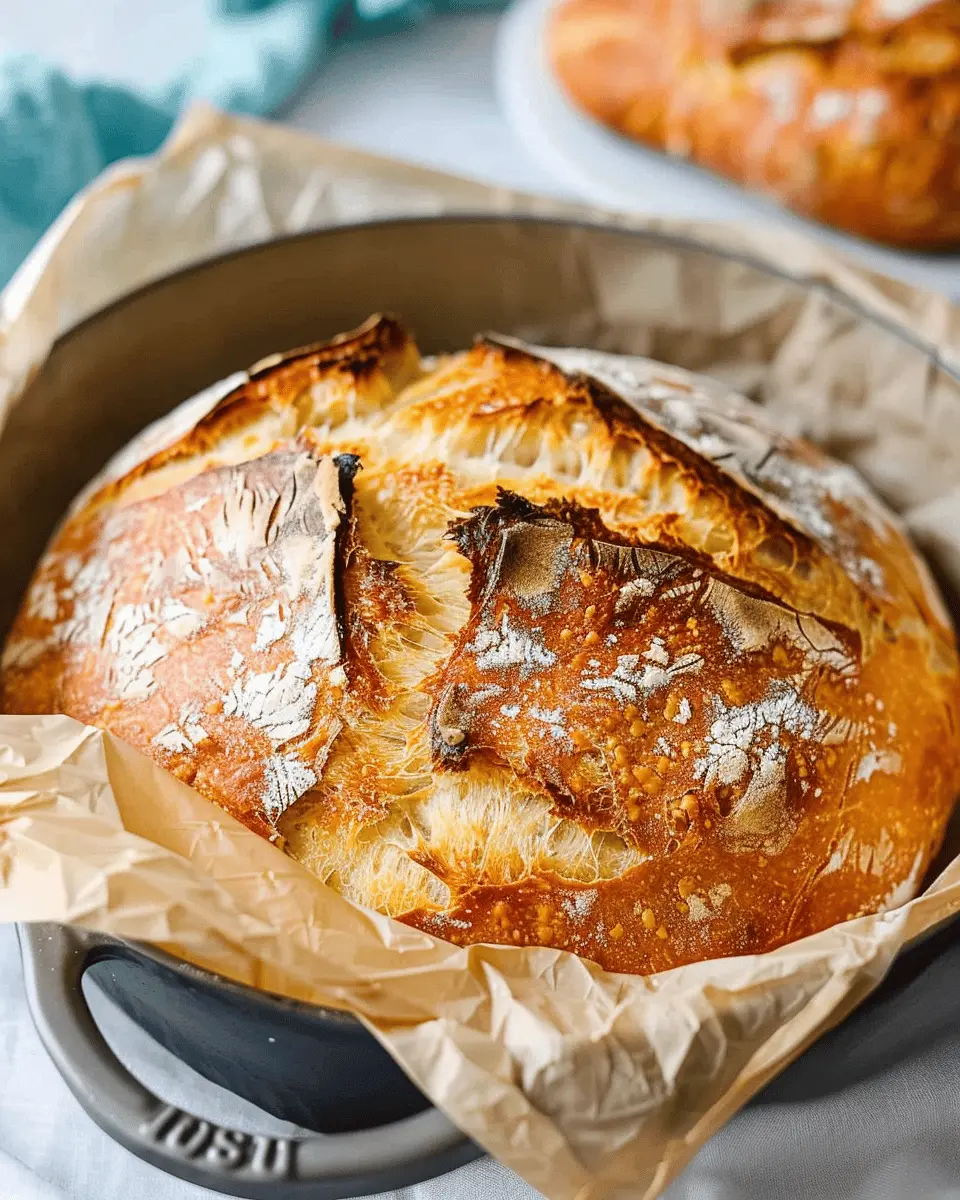
Preheat and Prepare the Dutch Oven
About 30 minutes before you’re ready to bake, preheat your oven to 450°F and place a Dutch oven inside. This retention of heat simulates the steam oven effect, resulting in a crispy crust. Remember to be cautious as everything inside will be extremely hot!
To prevent sticking, you might want to line the bottom of your Dutch oven with parchment paper, or lightly sprinkle it with flour just before placing the dough inside.
Bake the Bread
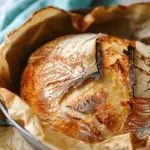
Once preheated, carefully remove the Dutch oven. Gently place your dough inside (it doesn’t have to be perfect; the rustic look adds charm). Cover with the lid and bake for 30 minutes. Afterward, remove the lid and continue baking for an additional 10-15 minutes until the crust turns a beautiful golden brown.
Ta-da! You’ve just created your own artisan bread. Allow it to cool on a wire rack, and don’t be too quick to cut, as this helps the texture to set perfectly.
Now, you’re ready to enjoy your homemade artisan bread fresh from the oven! How will you serve it—perhaps with some olive oil, fresh herbs, or your favorite spreads? The possibilities are endless!
Baking bread at home not only fills your kitchen with delightful aromas but also brings a sense of accomplishment and joy. Happy baking!
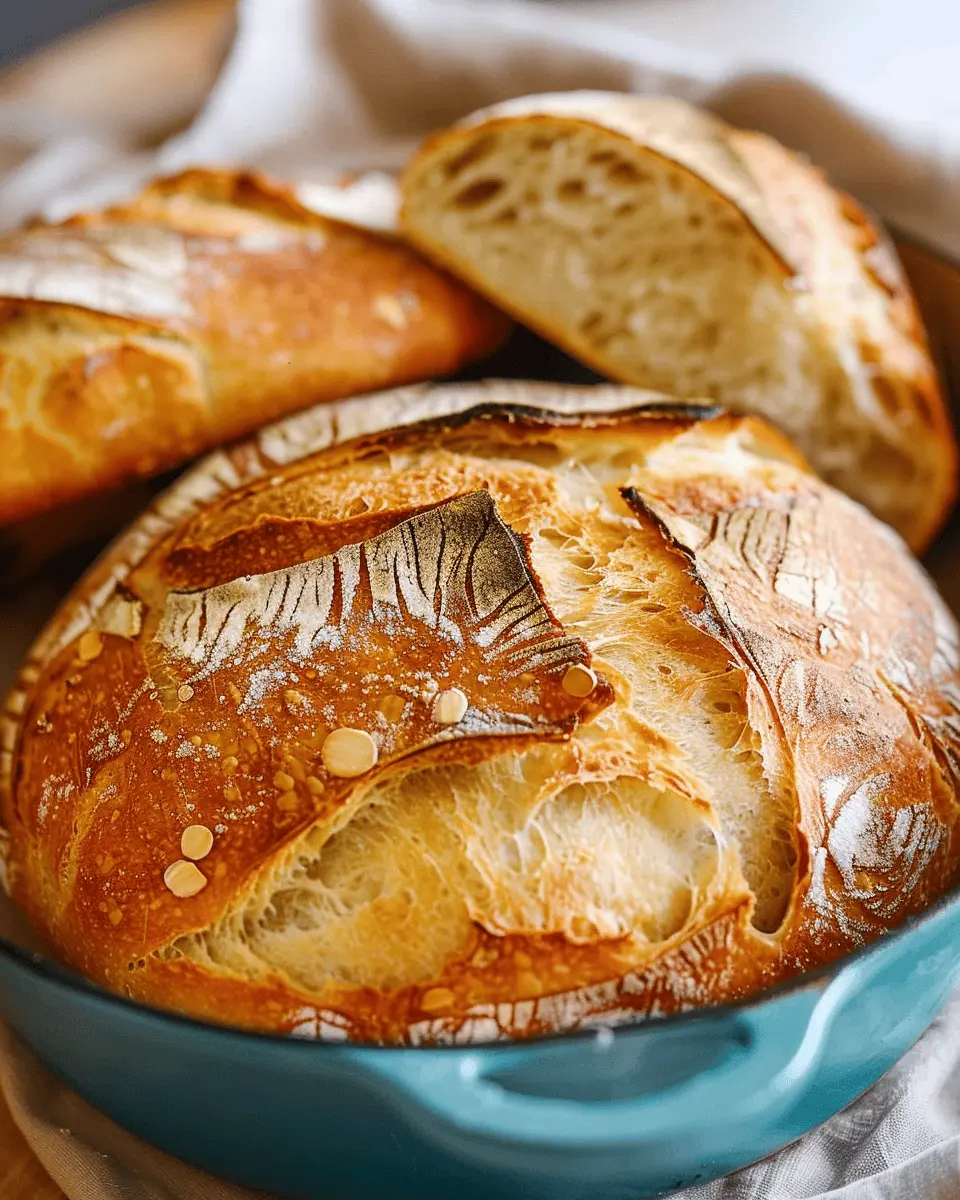
Variations on Artisan Bread Recipe
Artisan bread is a canvas for creativity, allowing you to experiment with flavors and textures. Here are some delightful variations to inspire your next baking adventure.
Whole Wheat Artisan Bread
For a healthier twist on the classic artisan bread recipe, try using whole wheat flour. This variation offers a nutty flavor and denser texture, plus the added benefit of more fiber—a win-win!
- Ingredients: Replace half of the all-purpose flour with whole wheat flour. You might want to add a tablespoon of honey or maple syrup to enhance the flavor.
- Method: Follow your standard recipe, but allow for a longer fermentation time. This helps develop the flavors and texture, resulting in a bread that’s both hearty and satisfying.
If you’re curious about the nutritional benefits of whole grains, sites like Healthline offer insightful articles.
Herb-Infused Artisan Bread
Take your artisan bread recipe to the next level by adding fresh herbs. Basil, rosemary, or thyme can transform your basic loaf into a fragrant masterpiece.
- How to Incorporate: Finely chop your herb of choice and fold it into the dough during the mixing stage. For a savory kick, consider adding minced garlic or sun-dried tomatoes.
- Baking Tip: Pair with olive oil for dipping—it makes for a stunning appetizer or side dish at your next gathering.
Seeded Artisan Bread
For texture and nutrition, add a variety of seeds to your heel. Pumpkin, sunflower, and sesame seeds not only enhance the taste but also provide additional health benefits, including heart-healthy fats.
- Mixing It Up: Sprinkle seeds into the dough or create a seed crust by applying a water wash before baking.
- Final Touch: A sprinkle of flaky sea salt on top will elevate your bread’s flavor profile.
Exploring these variations can instantly refresh your baking routine. Whether you crave the wholesome goodness of whole wheat, the aroma of herbs, or the crunch of seeds, these adaptations will not only impress your guests but also elevate your daily meals. So, why not give these variations a try? Happy baking!
Cooking Tips and Notes for Artisan Bread
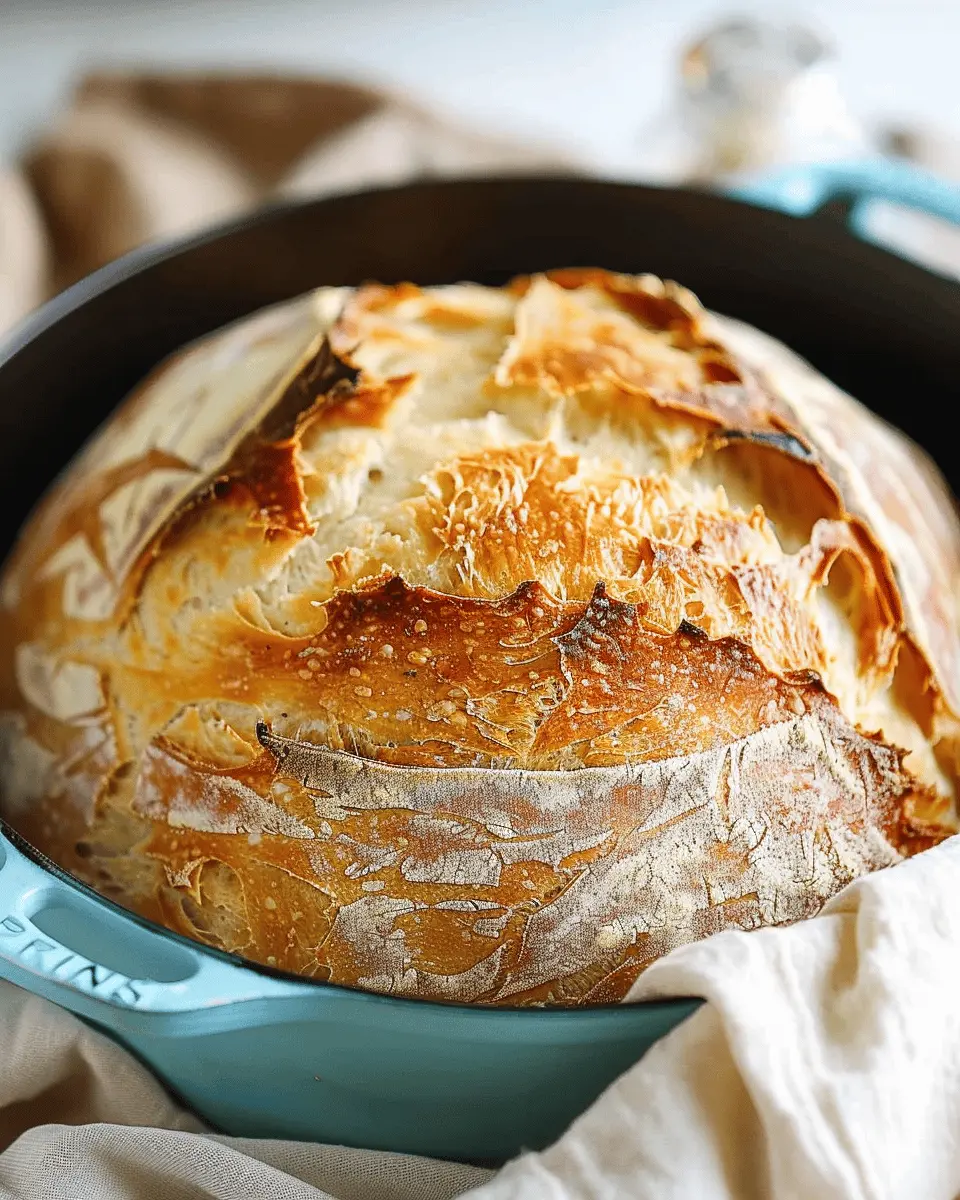
Use of Dutch Oven for Perfect Crust
One of the best-kept secrets in baking a perfect artisan bread is using a Dutch oven. This technique helps create a steamy environment, which is crucial for developing that golden, crispy crust we all love. Preheat the Dutch oven along with your oven to ensure it’s hot when you place your dough inside. This mimics professional steam-injected ovens and enhances your bread’s rise.
Managing Dough Stickiness
Don’t panic if your dough feels sticky—that’s a good sign! It often means you have a well-hydrated dough that can yield a lovely airy texture. To manage stickiness, keep your hands floured or use a bench scraper. This little tool works wonders in transferring and shaping sticky dough without tearing it.
Adjusting Baking Times for Different Ovens
Every oven is unique, and baking times can vary significantly. If you’re adapting your artisan bread recipe for a new oven, start by checking for doneness a few minutes sooner than the recipe suggests. This is especially helpful if you have a convection oven, which often cooks faster. Invest in an instant-read thermometer; bread is usually done at an internal temperature of about 200°F.
For more on the best baking tools, check out this link for a comprehensive guide!
Serving Suggestions for Artisan Bread
Pairing with Dips and Spreads
One of the most delightful ways to enjoy your artisan bread recipe is by dipping it in tantalizing spreads. Consider pairing slices with:
- Hummus: This chickpea-based spread is not only healthy but adds a creamy texture that complements the crusty bread beautifully.
- Olive Tapenade: A savory blend of olives and herbs gives each bite a Mediterranean flair.
- Cream Cheese or Herbed Goat Cheese: Both options add a rich element, especially when topped with fresh vegetables or smoked salmon.
These combinations create a perfect starter for gatherings or cozy evenings.
Perfect for Sandwiches and Toasts
Don’t underestimate the strength of artisan bread for sandwiches and toasts. Its dense structure holds fillings well and prevents sogginess, making it ideal for:
- Turkey Bacon Delight: Stack crispy turkey bacon, lettuce, and tomato for a hearty breakfast option.
- Chicken Ham Sandwich: Add layers of chicken ham, avocado, and greens for a delicious lunch that packs a punch.
For a quick treat, simply spread butter or avocado on toasted slices and sprinkle with salt for a simple yet satisfying snack. The versatility and deep flavors of artisan bread bring any meal to life!
For more inspiration, check out these delicious dip ideas.
Time Breakdown for Artisan Bread Recipe
When you embark on the journey of making your own artisan bread, understanding the time commitment can make the process smoother and more enjoyable. Here’s a breakdown of the key phases:
Preparation Time
The initial preparation time for this artisan bread recipe is about 20 minutes. You’ll mix, knead, and shape your dough, setting the stage for a delicious loaf.
Rising Time
This is where the magic happens. Allow your dough to rise for approximately 1 to 2 hours, depending on the temperature of your kitchen. A warm environment encourages a quicker rise, creating a light and airy bread.
Baking Time
Once your dough has risen, it’s baking time! Plan for about 30-40 minutes in a preheated oven. You’re looking for that perfect golden-brown crust.
Total Time
In total, you’ll spend around 2 to 3 hours on this artisan bread recipe from start to finish, not including the optional overnight fermentation. Enjoy the process, and savor the incredible aroma filling your home as it bakes.
For further guidance, check out King Arthur Baking to deepen your baking skills!
Nutritional Facts for Artisan Bread Recipe
Calories per Serving
When diving into the delightful world of your artisan bread recipe, you’ll be pleased to know that each serving packs around 160 calories. This makes it a fantastic choice for sandwich-making or simply enjoyed with a smattering of butter or olive oil.
Breakdown of Macronutrients
Understanding what’s in your bread can elevate your baking game. Here’s a quick overview of the macronutrient composition per serving:
- Carbohydrates: Approximately 30 grams – a good source of quick energy.
- Protein: About 6 grams – supporting muscle health.
- Fat: Roughly 1 gram – keeping it lean and wholesome.
This balance of nutrients means that your artisan bread can be enjoyed guilt-free, whether as a side dish or a hearty base for toppings. Furthermore, for those who love to delve deeper into nutrition, check out the USDA Nutrient Database for more insights on homemade bread variations.
Enjoy the crafting process, and remember—baking is as much about joy as it is about nutritional benefits!
FAQs about Artisan Bread Recipe
Can I use all-purpose flour instead of bread flour?
Absolutely! While using bread flour is ideal for the artisan bread recipe due to its higher protein content, all-purpose flour can still yield delightful results. The bread will likely have a softer texture, but it will still be delicious. If you’re low on bread flour, feel free to substitute. Just remember, the hydration level might require slight adjustments, as all-purpose flour absorbs water differently.
How do I store leftover artisan bread?
To keep your artisan bread fresh and tasty, store it at room temperature in a paper bag or wrapped in a clean kitchen towel. This allows the bread to breathe and helps maintain its crisp crust. Avoid plastic bags, which can make the crust chewy. If you have a lot of leftover bread, consider slicing it and freezing the pieces in an airtight container or freezer bag. Just pop it in the toaster for a quick and easy snack later!
What if my bread doesn’t rise properly?
First off, don’t sweat it! If your artisan bread didn’t rise, it could be due to a few common culprits:
- Yeast Issues: Check if your yeast is fresh and activated. Always proof yeast in warm water with a little sugar before adding it to your dry ingredients.
- Temperature: Make sure your dough is placed in a warm spot for fermentation. Too cold, and it won’t rise.
- Kneading: Insufficient kneading can also affect gluten development. Aim for a smooth and elastic dough when you’re done.
For a deeper dive into bread troubleshooting, check out this comprehensive guide on The Spruce Eats.
Experiment and enjoy the baking journey; nothing beats the smell of freshly baked bread filling your home!
Conclusion on Artisan Bread Recipe
Why You Should Try Making Artisan Bread
If you’ve never attempted to bake bread before, this artisan bread recipe is the perfect gateway. Not only do you get to enjoy the satisfying process of kneading and shaping the dough, but you also end up with fresh, warm bread that fills your home with an irresistible aroma. Imagine slicing into a crusty loaf to reveal a soft, airy interior – a pure delight!
Artisan bread is versatile; it pairs beautifully with soups, salads, or can simply be slathered with your favorite spread. Plus, it’s healthier than store-bought options. So why not take a break from the grind and indulge in the simple joy of bread-making? Trust me; your taste buds will thank you!
For a deeper dive into the science of bread-making, check out resources at King Arthur Baking, which offers guidance and a great bread baking community. Experiment, have fun, and happy baking!
PrintArtisan Bread Recipe: Easy Steps for Delicious Homemade Loaves
Learn how to make delicious homemade artisan bread with this easy-to-follow recipe.
- Prep Time: 15 minutes
- Cook Time: 30 minutes
- Total Time: 18 hours 45 minutes
- Yield: 1 loaf 1x
- Category: Bread
- Method: Baking
- Cuisine: American
- Diet: Vegetarian
Ingredients
- 4 cups all-purpose flour
- 1 1/2 teaspoons salt
- 1/2 teaspoon yeast
- 2 cups warm water
Instructions
- In a large bowl, mix flour, salt, and yeast.
- Add warm water and stir until combined.
- Cover the bowl with plastic wrap and let it rest for 12 to 18 hours.
- After resting, turn the dough onto a floured surface and shape it into a ball.
- Let it rise for 1-2 hours.
- Bake at 450°F for 30 minutes in a preheated Dutch oven.
Notes
- For a crustier loaf, bake with the lid off for the final 10 minutes.
- Experiment with different types of flour for varied flavors.
Nutrition
- Serving Size: 1 slice
Keywords: Artisan Bread Recipe, Homemade Bread, Baking