Introduction to Tasty Homemade Bread
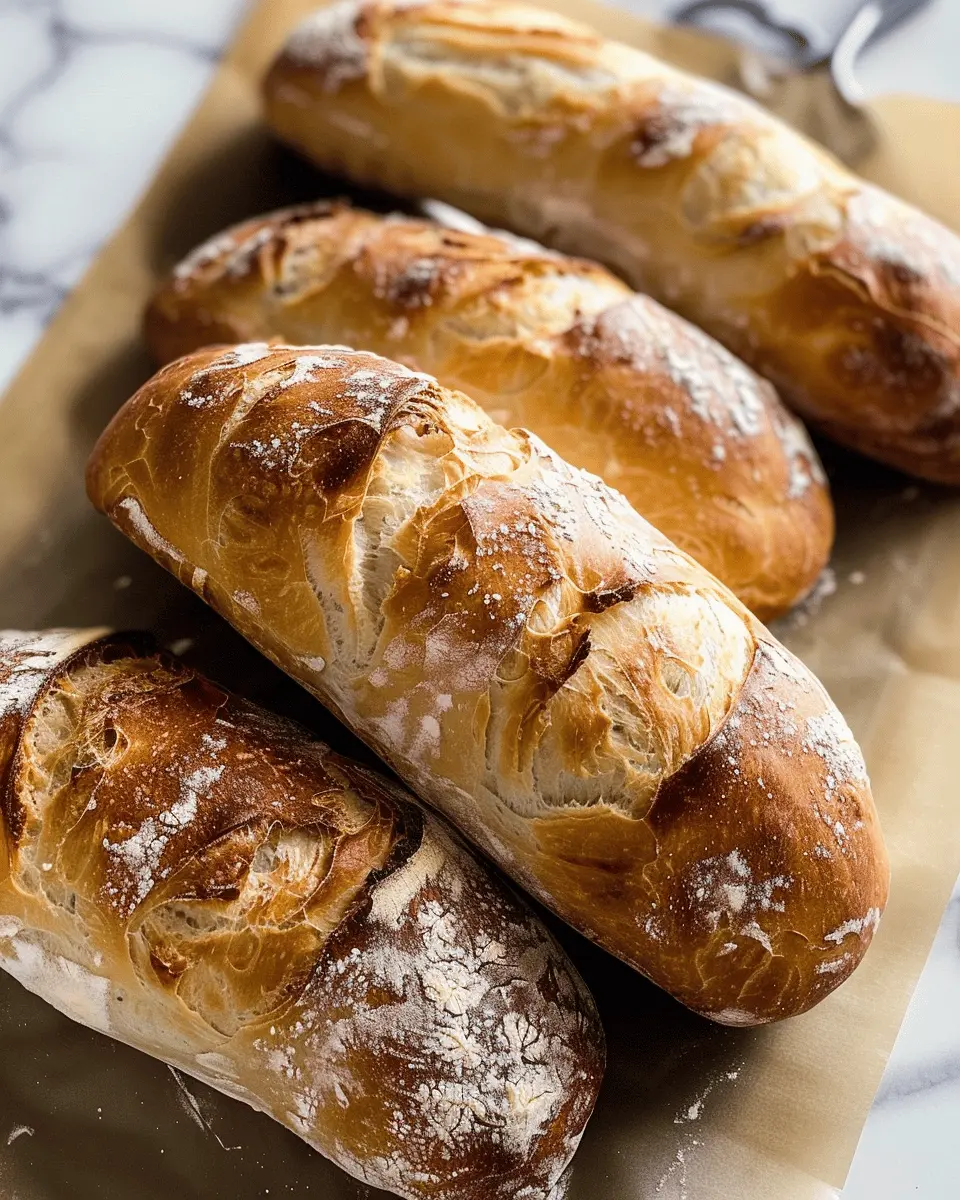
There’s something utterly magical about tasty homemade bread fresh out of the oven. As a young professional navigating the bustling demands of work and life, making bread at home might seem ambitious. However, it could be a game changer for both your taste buds and your wallet. With a bit of patience and the right technique, you can whip up a loaf of crusty Italian bread that elevates every meal.
Why Homemade Bread is a Game Changer for Young Professionals
Firstly, consider the sheer satisfaction of creating something from scratch. The therapeutic nature of kneading dough is a stress-buster, an enjoyable pause amid a hectic schedule. Plus, homemade bread tends to be healthier and tastier than store-bought varieties. You can control the ingredients, avoiding added preservatives and unnecessary calories. Did you know that many store-bought breads can contain more than 15 ingredients? In contrast, homemade bread typically requires just a handful of wholesome components, such as flour, water, salt, and yeast.
Another perk is cost-effectiveness. Artisan loaves can be pricey at bakeries, often ranging from $5 to $10 each. However, a simple homemade recipe can yield two loaves for the fraction of that cost. Investing a small amount of time into making your bread can lead to not just savings but also a culinary masterpiece that impresses friends and family alike.
Imagine coming home after a long day, the comforting aroma of garlic and herbs wafting through the air as your tasty homemade bread bakes to perfection. It’s the perfect companion for soups, salads, or just slathered with a bit of butter. Plus, sharing a freshly baked loaf can be a delightful way to connect with friends and family, making your home feel even more inviting.
For those curious about the science behind bread-making, understanding yeast fermentation can make the process even more exciting. Various resources, like King Arthur Baking, offer excellent insights into the hows and whys of bread-making, helping you to grasp the magic behind that crusty exterior and soft, fluffy interior.
So, why not roll up your sleeves and give homemade bread a shot? You might just find that it becomes your new favorite kitchen adventure.
Ingredients for Tasty Homemade Bread
When it comes to crafting tasty homemade bread, having the right ingredients is key. Here’s a friendly guide to help you get started on your delicious crusty Italian bread journey.
Essential ingredients for the perfect loaf
To bake a loaf that’s both crusty on the outside and soft on the inside, stock up on these must-haves:
- Flour: Use all-purpose or bread flour for that perfect structure.
- Yeast: Active dry yeast or instant yeast works wonders in giving your bread that lovely rise.
- Water: Filtered and lukewarm, it activates the yeast.
- Salt: Sea salt enhances flavor and controls fermentation.
- Olive Oil: A splash adds richness and improves the texture.
Optional ingredients for added flavor
Don’t hesitate to get creative! Consider these extras for a flavor boost:
- Herbs: Fresh or dried options like rosemary or thyme can enhance aroma.
- Garlic: Minced or powder for a savory twist.
- Cheese: Grated parmesan or mozzarella can add a delightful richness.
- Seeds: Sundried tomatoes or olives can elevate your bread to new heights.
Feeling adventurous? Check out King Arthur Baking for inspiration on creative bread variations!
Step-by-Step Preparation of Tasty Homemade Bread
Making tasty homemade bread is a gratifying experience that fills your home with the aroma of freshly baked goodness. With just a few simple ingredients, you can create delicious crusty Italian bread that’s perfect for any meal or occasion. Follow along with this step-by-step guide, and you’ll be on your way to becoming a bread-making pro!
Gather Your Ingredients and Tools
Before you dive into the creative process, it’s important to have everything at your fingertips. Here’s what you’ll need:
Ingredients:
- 4 cups all-purpose flour
- 1 ½ cups warm water (about 110°F or 43°C)
- 1 tablespoon sugar
- 2 teaspoons salt
- 1 packet of instant yeast (about 2 ¼ teaspoons)
- Optional: 1 tablespoon olive oil for extra flavor
Tools:
- A large mixing bowl
- A whisk or wooden spoon
- A clean surface for kneading
- A baking sheet or Dutch oven
- A sharp knife or bread lame for scoring
Having your ingredients and tools ready not only simplifies the process but heightens your excitement as you get ready to create a tasty homemade bread masterpiece.
Mix the Dry Ingredients Together
In a large mixing bowl, combine the flour, sugar, salt, and yeast. Whisk these dry ingredients until they are fully mixed. This step is crucial because it ensures the yeast is evenly distributed. Did you know that evenly mixed dry ingredients can lead to a lighter loaf? For more tips on how to troubleshoot common bread-making issues, check out this comprehensive guide on baking bread.
Combine with Water to Create Dough
Once the dry ingredients are well-combined, it’s time to bring them together with warm water. Gradually pour the water into the flour mixture while stirring with a wooden spoon or spatula. The dough will start to form; don’t worry if it seems a bit shaggy at first! You want the dough to be slightly sticky.
If you’ve opted for it, this is a good time to add the olive oil for some additional flavor. Once everything is blended, it’s time to get your hands in there. Knead the dough for about 8-10 minutes until it’s smooth and elastic.
The Art of Dough Rising
Now that your dough is beautifully kneaded, it’s time for it to rise. Transfer the dough into a lightly oiled bowl and cover it with a clean kitchen towel or plastic wrap. Place it in a warm spot, like your kitchen counter or near a window with sunlight. Let it rise until it doubles in size, roughly 1 to 2 hours.
Patience is key here! This initial rise develops flavor and texture, turning your dough into tasty homemade bread.
Shaping the Bread Loaves
Once your dough has risen, it’s ready to be shaped. Lightly flour your work surface and gently punch down the dough to release some of the gas. Divide it into two equal pieces, shaping each into a rectangle. Roll them tightly and tuck the edges underneath. Place your loaves seam-side down onto a floured surface or parchment paper for a second rise of about 30 minutes.
Scoring and Baking the Bread
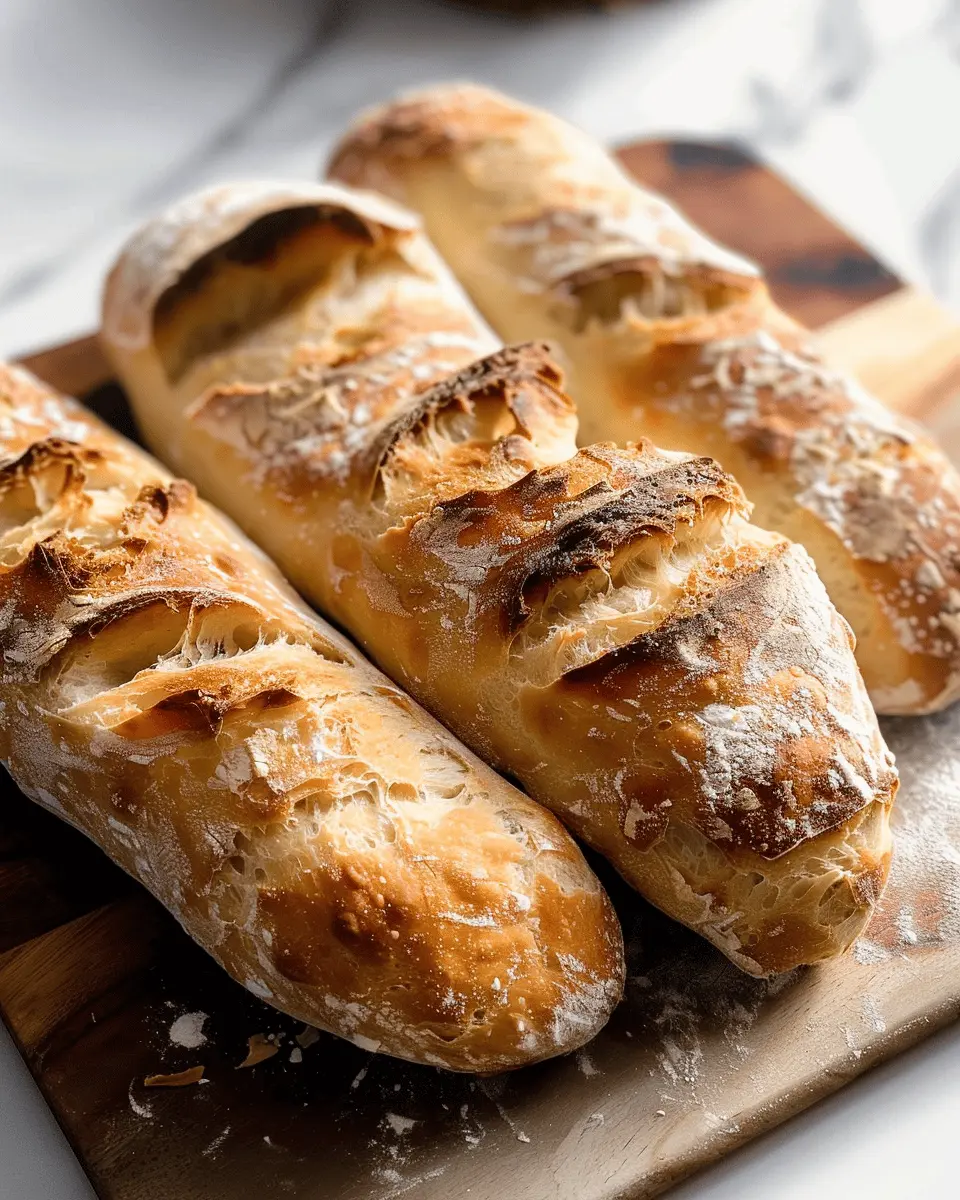
Preheat your oven to 450°F (232°C). Before placing your loaves in the oven, you’ll want to score the tops with a sharp knife or bread lame. This allows the gas to escape and gives the bread its signature crusty appearance.
Bake the loaves on a baking sheet or in a pre-heated Dutch oven for about 25-30 minutes, or until they’re golden brown and sound hollow when tapped on the bottom.
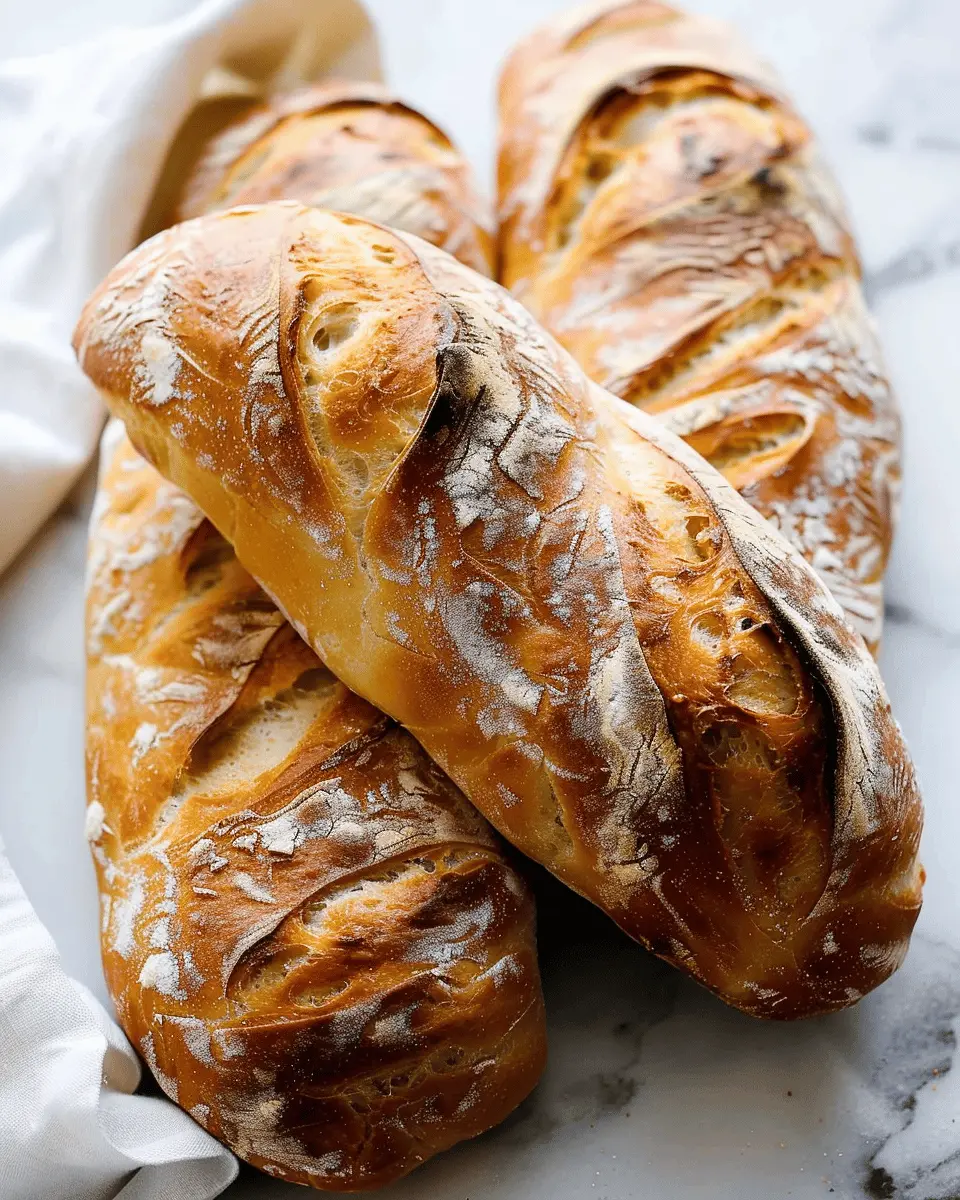
Now, step back and prepare for the moment you’ve been waiting for! Your home will be filled with the warm, toasty aroma of tasty homemade bread. Allow the bread to cool on a wire rack before slicing to let that interior finish its set.
And there you have it! With just a bit of time and care, you can whip up delicious Italian crusty bread that will impress friends and family alike. Happy baking!
Variations on Tasty Homemade Bread
Creating tasty homemade bread can be an exciting adventure, especially when you start to explore variations that bring different flavors and textures to your baking game. Here are a couple of popular ideas to consider!
Artisan Bread Variations: Herbs and Spices
Why stick to the basics when you can elevate your bread with delightful herbs and spices? Imagine adding:
- Rosemary for a piney punch
- Thyme for a subtle earthiness
- Garlic powder for that rich, savory aroma
These additions not only complement the crusty, golden exterior of your Italian bread but also infuse each slice with aromatic goodness. A sprinkle of sea salt or even a dash of cracked black pepper can also enhance flavor, making your homemade bread a perfect companion for soups or salads. If you’re curious about bread-making techniques, check out resources on The Fresh Loaf, which offers community expert advice.
Sweet Options: Adding Fruits and Nuts
Looking for a sweet twist? Consider incorporating fruits and nuts into your crusty Italian bread! Dried fruits like cranberries or apricots provide a natural sweetness, while walnuts or almonds add crunchy texture. Furthermore, you can enhance this by brushing your baked loaf with a simple honey glaze after it comes out of the oven, giving it that extra barely-there sweetness.
For an even better idea, think about experimenting with cinnamon or nutmeg to complement those fruits. Just imagine spreading a bit of cream cheese on a warm slice topped with Turkey Bacon or Chicken Ham — now that’s a good breakfast!
With these variations, your tasty homemade bread becomes a versatile canvas ready to impress at any meal. Have fun experimenting, and remember: the best creations often come from your own kitchen!
Cooking Tips and Notes for Tasty Homemade Bread
Key Tips for Handling Yeast
Yeast is your friendly kitchen companion when making tasty homemade bread! Start by ensuring your yeast is fresh; expired yeast can lead to disappointing results. When activating yeast, use warm water (around 105°F to 110°F) — too hot will kill it, too cold won’t wake it up. Always add a pinch of sugar to help kickstart the fermentation process. Did you know that according to King Arthur Baking, the right temperature can dramatically improve your bread rise?
Troubleshooting Common Bread-making Mistakes
Even seasoned bakers can face slip-ups. If your bread is dense, it could be under-kneaded or you might have added too much flour. For a perfect crusty finish, increase the oven temperature while baking; a hotter oven creates that beautiful texture. If you find air bubbles popping in your dough, you may be over-proofing. Remember, practice makes perfect, so don’t get discouraged! Check out this guide for more insights on common bread-making issues.
With a bit of patience and these tips, you’ll be enjoying your delicious homemade crusty Italian bread in no time!
Serving Suggestions for Tasty Homemade Bread
Pairing with Spreads and Toppings
One of the best parts about creating your tasty homemade bread is experimenting with spreads and toppings. Try slathering warm slices with a rich, creamy butter or herbed olive oil for a delightful treat. If you’re looking for something a bit healthier, consider hummus or a tangy avocado spread to complement the crusty exterior. For an indulgent twist, you can’t go wrong with cream cheese topped with fresh herbs or even a layer of pesto.
Creative Uses in Meals
Think beyond the typical sandwich—your tasty homemade bread can elevate numerous dishes! Use it to make hearty garlic toast as a starter or serve it alongside soups and salads for that extra crunch. How about crafting a delectable bread bowl for dips? Just hollow out a loaf, fill it with your favorite cheesy dip, and you’re golden.
Feel free to explore more pairing ideas by checking out websites like Food52 or Serious Eats. You’ll find endless inspiration and new ways to enjoy your creation!
Time Breakdown for Making Tasty Homemade Bread
Making tasty homemade bread is a fulfilling experience that doesn’t consume your entire day. Here’s a concise breakdown of the time you’ll need:
Preparation Time
Expect to spend about 15-20 minutes gathering your ingredients and mixing them together. This is where the magic begins!
Rising Time
Patience is key here. Allow your dough to rise for approximately 1 hour. This step is essential for developing that perfect texture and flavor.
Baking Time
Once risen, your bread requires around 30-35 minutes in the oven. Make sure to keep an eye on it for that beautiful golden crust.
Total Time
In total, you’re looking at about 1.5 to 2 hours from start to finish, including the rise. With this minimal effort, you’ll soon enjoy the incredible aroma and taste of freshly baked bread!
For more insights on the bread-making process, check out resources like King Arthur Baking or The New York Times Cooking to deepen your skills. Happy baking!
Nutritional Facts for Tasty Homemade Bread
Calories per slice
When indulging in tasty homemade bread, you may be curious about its caloric content. Each slice typically contains around 80-100 calories, depending on the ingredients and portion size. This means enjoying a few slices with a meal or as a snack won’t break the calorie bank!
Protein content
This homemade bread is not just about carbs; it also packs a protein punch! Each slice generally has about 3 grams of protein. Pair it with some turkey bacon or chicken ham for a nutritious breakfast option that keeps you fueled throughout your busy day.
Fiber and nutrition benefits
One of the best features of homemade bread is the potential fiber content. Using whole wheat flour can significantly boost fiber levels, which is beneficial for digestion and maintaining healthy cholesterol levels. Plus, the whole grains found in quality flour may help with heart health. For more insights, check out the benefits of whole grains here.
Nourishing your body with tasty homemade bread can be a delightful experience that supports your overall well-being. Why not give it a try?
FAQs about Tasty Homemade Bread
What if my bread doesn’t rise?
It can be a bummer when your tasty homemade bread doesn’t rise as expected. There are a few reasons this might happen:
- Yeast issues: Make sure your yeast is fresh. Old yeast can lead to a flat loaf. If you’re uncertain, consider doing a “proof check” by mixing yeast with warm water and sugar; if it bubbles after a few minutes, you’re good to go!
- Temperature: Dough needs a warm environment to rise. If your kitchen is too cold, try placing your dough in an oven (turned off) or a sunny spot in your home.
- Kneading: Proper kneading develops gluten, which helps the bread rise. Aim for at least 8-10 minutes of kneading for optimal results.
Can I make this bread gluten-free?
Absolutely, you can adapt this tasty homemade bread recipe to be gluten-free! Use a high-quality gluten-free flour blend that contains xanthan gum. Most blends are designed to mimic the texture of traditional wheat flour, making them suitable for baking. Keep in mind, however, that gluten-free bread may require some adjustments in hydration, so add liquid gradually.
How do I properly store homemade bread?
To keep your bread fresh, consider these storage tips:
- Room temperature: Wrap your loaf in a clean kitchen towel and store it in a plastic bag. Avoid using the fridge, as it can dry out the bread.
- Freezing: If you can’t finish it within a few days, slice it and freeze. Just ensure to wrap each piece tightly to avoid freezer burn. When you’re ready, pop it in the toaster for that freshly-baked feel!
For more tips on bread storage, check out the USDA’s guidelines here. Happy baking!
Conclusion on Tasty Homemade Bread
Recap of the Joys of Baking Homemade Bread
Baking tasty homemade bread is more than just an act; it’s an experience that warms your kitchen and creates lasting memories. The process of measuring, mixing, and kneading dough brings a sense of satisfaction that few other cooking endeavors can match.
Imagine the delightful aroma filling your home as you pull a fresh loaf from the oven. Each bite of your crusty Italian bread not only satisfies cravings but also nurtures creativity and togetherness. Whether you’re sharing it at a family gathering or savoring it solo with a cup of coffee, homemade bread is a comfort food that elevates any meal.
Keen to dive deeper into the world of baking? Check out Breadtopia for tips on bread-making techniques and troubleshooting. Embrace this enriching journey and transform your kitchen into a bakery!
PrintTasty Homemade Bread: Crusty Italian Bread Recipe You’ll Love

Learn how to make Tasty Homemade Crusty Italian Bread that will impress your family and friends.
- Prep Time: 15 minutes
- Cook Time: 30 minutes
- Total Time: 1 hour 45 minutes
- Yield: 1 loaf 1x
- Category: Bread
- Method: Baking
- Cuisine: Italian
- Diet: Vegetarian
Ingredients
- 4 cups all-purpose flour
- 1 ½ teaspoons salt
- 2 teaspoons sugar
- 1 packet active dry yeast
- 1 ¾ cups warm water
- 2 tablespoons olive oil
Instructions
- In a large bowl, combine warm water, sugar, and yeast. Let it sit for 10 minutes until frothy.
- Add the olive oil and salt to the yeast mixture.
- Gradually add flour, mixing until a dough forms.
- Knead the dough on a floured surface for about 10 minutes until smooth.
- Place the dough in a greased bowl, cover, and let rise until doubled (about 1 hour).
- Punch down the dough and shape into a loaf.
- Place the loaf on a baking sheet and let rise again for 30 minutes.
- Preheat the oven to 450°F (232°C).
- Make a few slashes on top of the loaf and bake for 25-30 minutes until golden brown.
Notes
- For a crustier loaf, place a pan of water in the oven while baking.
- Allow the bread to cool completely before slicing.
Nutrition
- Serving Size: 1 slice
- Calories: 200
- Sugar: 1g
- Sodium: 300mg
- Fat: 3g
- Saturated Fat: 0.5g
- Unsaturated Fat: 2g
- Trans Fat: 0g
- Carbohydrates: 38g
- Fiber: 2g
- Protein: 6g
- Cholesterol: 0mg
Keywords: Tasty Homemade Crusty Italian Bread